
Install & Launch
This section takes you from “I have a Windows machine” to “Data Collage is open and activated.” If you’ve worked through §2 — Before You Begin, you already have the basics lined up.
Download
Section titled “Download”You’ll receive a download link from Newarc. Two installer formats are available:
DataCollage-Setup.exe— recommended for most users. Standard Windows installer.DataCollage-Setup.msi— for IT-managed deployments via SCCM, Intune, or similar enterprise tooling.
Pick the format that suits you. The end result is the same app either way.
Install
Section titled “Install”Double-click the installer and follow the wizard. A few things to know:
- No admin rights required. The installer runs in user-mode and writes to your local profile.
- Pick your install location when prompted. The default works for most people; pick something else if your IT policy requires a specific path.
- Windows SmartScreen may show “Windows protected your PC” the first time you run an unsigned installer. Click More info → Run anyway to proceed.
A note on code signing: Data Collage will be fully code-signed before public launch. During the V1 test phase, the SmartScreen warning above is expected and safe to bypass — once code signing is in place, the warning disappears.
First launch
Section titled “First launch”Open Data Collage from the Start menu or the desktop shortcut. The app opens straight to the License activation screen.
Activate your license
Section titled “Activate your license”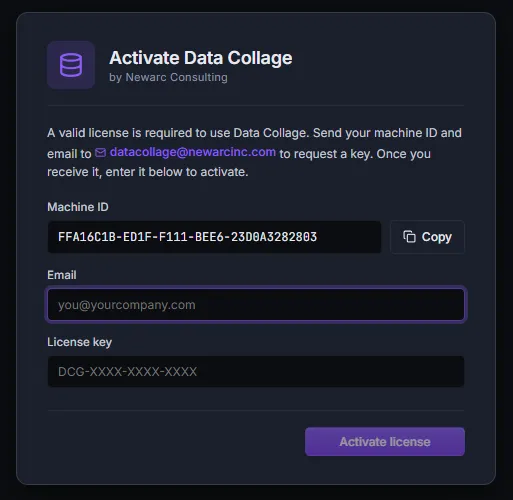
The activation screen shows three fields:
- Machine ID — a unique identifier for this specific computer, already filled in. There’s a Copy button next to it.
- Email — the email address you want associated with your license.
- License key — the key Newarc will send back to you.
Activation flow:
- Click Copy next to the Machine ID.
- Send an email to datacollage@newarcinc.com with:
- The Machine ID you just copied
- The email address you’d like to use for your license
- The Newarc team will activate your license and reply with both the email address (the one you proposed, normalized) and a license key (typically within one business day).
- Back in Data Collage, paste both into the activation screen — exactly as Newarc returned them — and click Validate.
- The app unlocks and continues to the welcome experience below.
The Machine ID is tied to this specific machine. If you reinstall on the same machine, your license activates automatically against the saved record. If you move to a new machine, email us — we’ll reactivate.
Welcome and guided tour
Section titled “Welcome and guided tour”After activation, a Welcome to Data Collage dialog appears with a brief feature summary and two buttons: Take the tour or Maybe later.
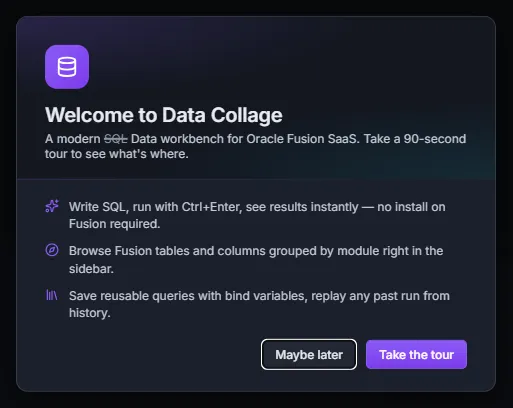
The guided tour is a 90-second walk-through of the main parts of the app — the activity bar on the left, the editor, the results grid, and the key panels (Connections, Query Library, Analyses, Metadata). It’s the fastest way to get oriented, so we recommend running it at least once.
If you skip it (or want to revisit it later — including showing it to a colleague), you can re-launch the tour anytime from Help → Take the tour.
What’s next
Section titled “What’s next”Head to §4 — Your First Query for the 5-minute walkthrough that ends with you exporting your first result set.
Updates
Section titled “Updates”Data Collage V1 is delivered as a downloadable installer. To update to a newer version:
- Download the new installer from Newarc.
- Run it over your existing installation.
- Your saved connections, analyses, query history, and settings are preserved across upgrades.
In-app auto-updates (the app checking for and applying updates on its own) are planned for V1.2. Until then, the download-and-reinstall flow is the official update path.